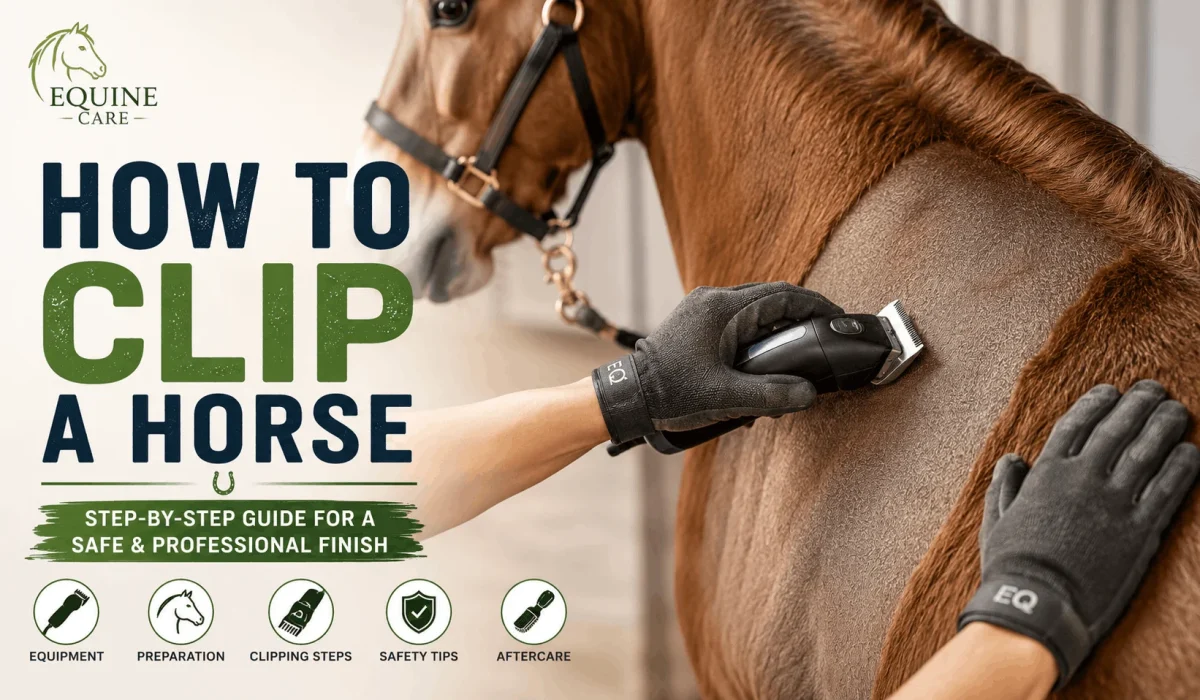
Learning how to clip a horse is one of the most useful skills you can master for winter horse care. This horse clipping guide walks you through everything you need, from choosing the right clip to finishing the sensitive areas with confidence. Clipping removes the thick winter coat so your horse stays comfortable, dries faster after work, and looks tidy through the colder months. Follow the steps below and you will clip your horse safely, evenly, and without the stress that catches so many owners off guard.
Horse clipping is the process of trimming or removing a horse’s coat with electric clippers, because a heavy winter coat causes excessive sweating, slow drying, and skin problems during regular exercise. Done well, it protects your horse’s health, keeps your horse comfortable in work, and makes daily grooming far easier all winter.
Whether you own one much loved pony or a yard full of competition horses, the same principles apply. Get the timing right, prepare properly, and take your time, and clipping becomes a calm, rewarding routine rather than a dreaded chore.
| Key Takeaways Clip when the winter coat sets in, usually from early autumn onward. Choose a clip type that matches your horse’s workload and turnout. Sharp, clean, well oiled blades give smooth lines and fewer marks. Clip against the direction of hair growth for an even finish. Take extra care and patience around the face, ears, legs, and belly. |
What Is Horse Clipping?
Horse clipping is the removal of some or all of the winter coat using electric horse clippers. The main goal is comfort. A horse in regular work builds heat quickly, and a thick coat traps that heat and sweat against the skin. Removing the right amount of hair keeps your horse cooler in work and warmer at rest, since you can then rug it to suit the conditions.
Think of it this way. A woolly winter coat is perfect for a horse standing in a field, yet it becomes a heavy blanket the moment that horse starts to canter. Clipping lets you control how much insulation your horse keeps, so you can match the coat to the work and the weather.
Here is the key thing to remember. Clipping is not only about looks. It supports skin health, speeds up cooling, and lowers the risk of chills after exercise. The British Horse Society notes that a clipped horse dries far more quickly, which reduces the time a sweaty coat sits cold against the body and helps prevent a post work chill.
Why Owners Choose to Clip
There are several practical reasons owners decide to clip, and most come down to health and comfort rather than appearance alone. A clipped horse works more comfortably and recovers faster after exercise.
The most common reasons to clip include the following:
- Prevent heavy sweating during winter exercise.
- Help the coat dry quickly after work.
- Reduce the risk of chills from a damp coat.
- Make grooming and mud management simpler.
- Support horses with Cushing’s disease that grow abnormal coats.
- Keep a neat, professional look for competition.
The bottom line is this. Clipping is a management tool, and the right approach depends entirely on your individual horse and how hard it works. A hard working eventer and a lightly ridden happy hacker have very different needs, so there is no single right answer for every horse. Weigh up the workload, the living arrangements, and the local climate before you decide how much coat to take off.
When Is the Best Time to Clip a Horse?
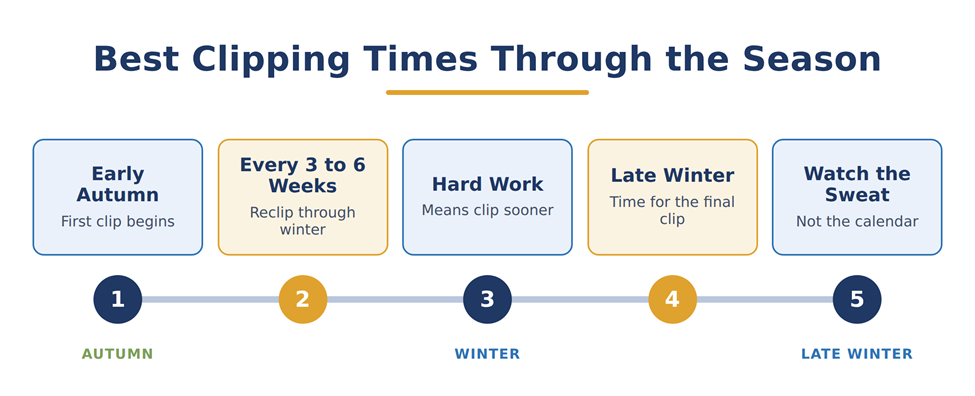
The best time to clip a horse is early autumn, once the winter coat has grown in fully, typically from late September through October in most climates. Clipping too early means the coat keeps growing and you will need to repeat the job within weeks.
Autumn: The Main Clipping Season
Most owners begin clipping as soon as the horse starts to sweat under its thickening coat. Researchers linked to the University of Kentucky’s Gluck Equine Research Center highlight that coat growth responds to shortening daylight, so the first clip usually lines up with the autumn drop in daylight hours.
Once you start, you can reclip through the season as the coat regrows. Many horses need a second or third clip before midwinter to stay tidy and comfortable. Keep an eye on how fast the hair returns, as this varies a lot between individuals and breeds.
Timing Your Final Clip
Your last clip of the season matters for the summer coat. As a general rule, avoid clipping after late winter, because a clip too close to spring can affect how the summer coat comes through. Horse and Hound advises stopping regular clipping once the days lengthen and the summer coat begins to appear.
Plan your final clip with any spring competitions in mind. A well timed last clip helps your horse move into the warmer months with a smooth, glossy summer coat rather than patchy regrowth. As a guide, many owners aim to finish clipping by late January or early February, depending on their climate and workload.
How Weather and Workload Affect Timing
Weather and workload both shift the ideal timing. A horse in hard daily work may need clipping earlier and more often, while a lightly ridden horse might only need one clip all winter. Knowing the best time to clip a horse means reading your own horse, not just the calendar.
Think of it this way. The calendar gives you a starting point, but your horse’s sweat patterns give you the real answer. If your horse is soaked and slow to dry after a schooling session, it is time to clip.
When NOT to Clip Your Horse
Do not clip a horse when the coat or skin condition makes clipping unsafe or ineffective, because poor timing and poor coat condition lead to uneven results, blade damage, and skin irritation. Knowing when to wait is just as important as knowing how to clip.
But here is where most horse owners go wrong. They rush into clipping without checking the coat, the weather, or the horse’s temperament. A little patience prevents most clipping disasters and keeps the experience positive for your horse. A few minutes spent assessing the conditions can save you hours of frustration and protect your horse from an uncomfortable, chilly night.
Avoid clipping in these situations:
- When the coat is wet, greasy, or caked in mud, since dirt blunts blades fast.
- When the horse is unwell, stressed, or recovering from illness.
- When you cannot provide suitable rugs for the colder, clipped horse.
- When temperatures are about to plunge and you have no way to keep the horse warm.
- When you lack time to finish the job calmly in one sitting.
The bottom line is this. A clipped horse loses natural insulation, so you must be ready with the right rugs and shelter before you switch on the clippers. Clipping a horse safely always starts with good preparation and honest judgement about the conditions.
How to Clip a Horse (Step by Step)
Clipping a horse is a methodical process that rewards patience over speed. Work through these eight steps in order, and you will get clean lines, an even finish, and a calm, cooperative horse. This is the core of any reliable horse clipping guide.
Before you begin, make sure your horse is clean, dry, and comfortable. Fresh, sharp blades and a quiet, well lit space make the whole job easier for both of you. A relaxed start almost always leads to a relaxed finish. Set aside plenty of time so you never feel rushed, since a hurried clip is where mistakes and stress creep in.
Step 1: Secure Your Horse Safely
Start by tying your horse securely in a familiar, well lit area with a non slip floor. A calm environment sets the tone for the entire session and keeps you both safe throughout.
Use a quick release knot or a safety tie, and have a helper on hand for a nervous horse. Good preparation here prevents most accidents later. Remove any hazards from the area so nothing startles your horse mid clip. When clipping nervous horses, a calm helper and a familiar, quiet routine make a real difference to how the session goes.
Step 2: Start With Clean, Sharp Blades
Always begin with clean, sharp horse clipper blades fitted correctly to the clippers. Blunt or dirty blades pull the coat, leave lines, and overheat quickly against the skin.
Wipe the blades before you start and check they are seated properly. Sharp blades cut smoothly and reduce the risk of tugging sensitive areas. If your blades feel dull from the first stroke, stop and swap them for a fresh set.
Step 3: Clip Against the Direction of Hair Growth
Move the clippers against the direction of hair growth for the closest, most even finish. On most of the body this means working upward and forward in long, overlapping strokes.
Keep your strokes steady and let the clippers do the work. Overlapping each pass slightly stops the tramline marks that ruin an otherwise neat clip. Watch how the coat lies, since hair direction changes across the body.
Step 4: Keep Even Pressure
Apply light, even pressure and let the blades glide flat against the skin. Pressing too hard causes drag lines and can nick the skin over bony areas such as the shoulder and hip.
Follow the contours of the body and keep the whole blade in contact with the coat. Even pressure is the secret behind smooth, professional looking clip lines that need no tidying afterward.
Step 5: Cool and Oil the Blades Regularly
Stop often to oil the blades and let them cool, because hot blades are the most common cause of clipper burn and an uncomfortable horse. A few drops of blade oil every ten minutes keeps everything running smoothly.
Feel the blades against the back of your hand. If they feel too warm for your skin, they are too warm for your horse. Coolant spray helps bring the temperature down quickly during long sessions.
Clipper burn is skin irritation caused by hot or dirty blades, because friction and heat build up when the blades are not cooled and oiled often enough during a clip. Regular breaks, fresh oil, and a quick spray of coolant keep the blades comfortable and protect your horse’s skin from soreness.
Step 6: Work Section by Section
Break the body into logical sections and finish one area before moving to the next. Working section by section keeps your lines consistent and stops you missing patches.
Start on the large, flat areas such as the shoulder and barrel to build confidence. Save the tricky, sensitive areas for later once your horse has settled into the routine and relaxed.
Step 7: Blend Difficult Areas
Blend awkward areas such as the elbows, stifle, and flank with careful, feathering strokes. These creased, mobile areas need a helper to stretch the skin flat for a clean pass.
Angle the clippers gently and take your time. Smooth blending here is what separates a tidy clip from an amateur one. If you see a slight line forging, go back over it lightly to soften the edge.
Step 8: Finish the Legs, Head, and Sensitive Areas
Finish with the legs, head, and other sensitive areas using slow, deliberate strokes. Many owners switch to smaller trimming clippers for these delicate spots to gain extra control.
Stay calm and reassure your horse throughout. If your horse grows anxious, pause, offer a break, and return when it has relaxed. Ending on a positive note makes the next clip much easier.
Equipment You Will Need Before Clipping
Good clipping starts with good tools. Gathering the right equipment before you begin saves time, protects your horse, and gives you a far cleaner result. Here is everything you need for a smooth clipping session.
Think of it this way. A builder never starts without the right tools, and clipping is no different. Quality equipment makes horse body clipping quicker, safer, and much less stressful for you and your horse. Lay everything out within easy reach before you start, so you are never hunting for oil or a spare blade mid clip.
Horse Clippers
Invest in a reliable pair of horse clippers suited to the job. Heavy duty mains clippers handle full body work, while lighter cordless models suit tidying and sensitive areas.
Choose a model with good reviews and adequate power for your horse’s coat. Well made horse clippers run cooler and cope with thick winter hair without straining or stalling partway through a clip.
Clipper Blades
Keep several sets of sharp horse clipper blades ready before you start. Blades come in different cut lengths, so you can leave more or less coat depending on the finish you want.
Have a spare, sharpened set on hand in case one pair dulls or overheats. Sharp blades are the single biggest factor in a smooth, even clip, so never skimp on blade care.
Blade Oil and Coolant
Blade oil and clipper coolant spray are essential, not optional. Oil keeps the blades gliding freely, while coolant brings down the temperature during long sessions.
Apply oil regularly throughout the clip and spray coolant whenever the blades feel warm. This simple habit prevents clipper burn, protects your horse’s skin, and greatly extends blade life.
Grooming Brushes
Thorough horse grooming before clipping removes the dirt and grease that blunt blades. A clean coat clips faster and gives a noticeably better finish with fewer lines.
Use a stiff brush, then a soft brush, to lift and remove surface dust. Clean, dry hair is the foundation of every good clip, so never rush this preparation step.
Extension Cords or Cordless Batteries
Plan your power supply before you begin. If you use mains clippers, a safe outdoor rated extension cord keeps you connected without tangles or trip hazards near your horse.
For cordless clippers, charge every battery fully and keep a spare ready. Losing power halfway through a clip leaves an untidy, uneven coat and a frustrated horse.
Protective Clothing
Wear suitable protective clothing to stay comfortable and safe. Overalls keep loose hair off your skin, and sturdy boots protect your feet near a moving horse.
Consider a dust mask and safety glasses for long sessions. Clipped hair gets everywhere, and a little protection makes the whole job far more pleasant and much easier to clean up.
Types of Horse Clips
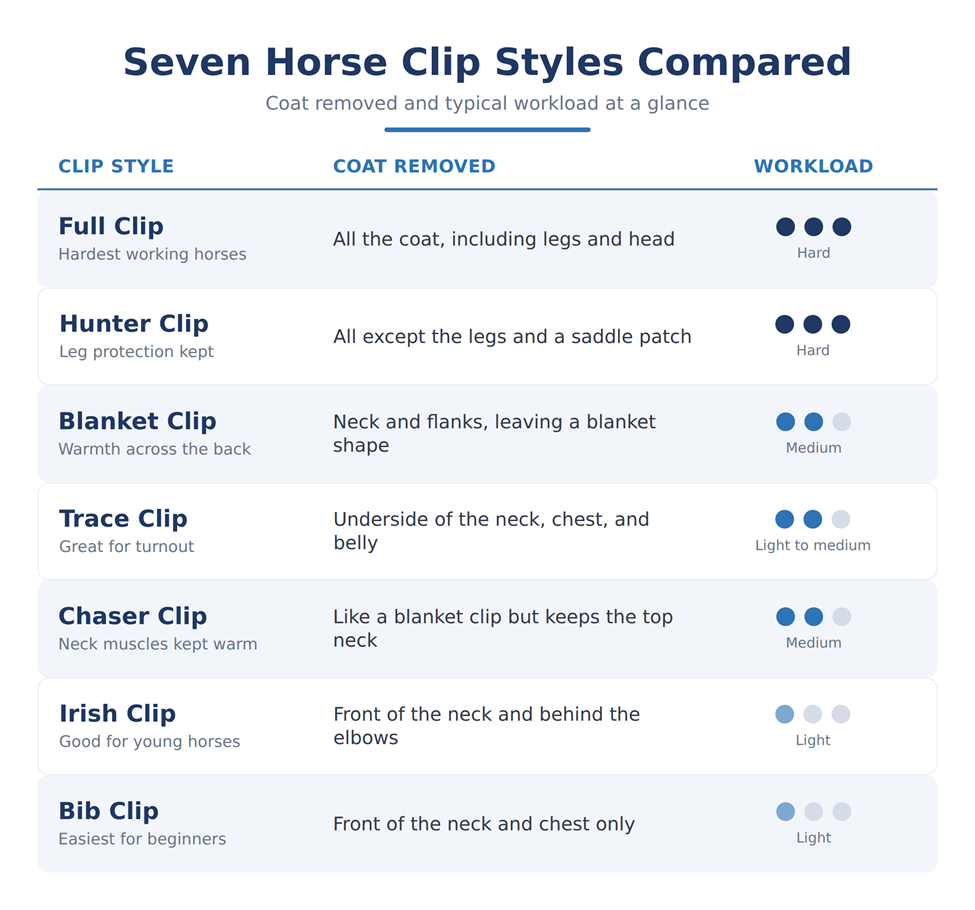
There are seven common horse clip styles, and choosing the right one depends on how hard your horse works and how much time it spends turned out. Each of these horse clipping patterns removes a different amount of coat, balancing warmth against cooling.
The table below compares the main clip types at a glance, then each section explains exactly what it removes and who it suits. Use it as a quick reference when deciding which horse clip styles fit your routine. Remember that you can adjust any of these patterns slightly to suit your own horse, its coat, and the demands of your winter schedule.
| Clip Type | Coat Removed | Best Suited To |
| Full clip | All the coat, including legs and head | Horses in hard, regular work |
| Hunter clip | All except the legs and a saddle patch | Hard working horses needing leg protection |
| Blanket clip | Neck and flanks, leaving a blanket shape | Horses in medium work |
| Trace clip | Underside of the neck, chest, and belly | Light to medium work and turnout |
| Chaser clip | Like a blanket clip but keeps the top neck | Medium work with daytime turnout |
| Irish clip | Front of the neck and behind the elbows | Young horses and light work |
| Bib clip | Front of the neck and chest only | Light work with full turnout |
Full Clip
A full clip horse has all of the coat removed, including the legs and head. This style suits horses in hard, regular work that sweat heavily and need to dry quickly after exercise.
Because it removes every scrap of insulation, a full clip demands careful rugging and stabling. It gives the sleekest, most competition ready finish, which is why many show and performance horses wear one. Expect to layer rugs as the temperature drops, as a fully clipped horse relies entirely on you for warmth.
Hunter Clip
A hunter clip horse keeps the hair on the legs and a saddle shaped patch on the back. The legs stay protected from thorns and cold, while the saddle patch cushions the back under tack.
This clip suits hard working horses, especially those hunting or eventing through winter. It balances heat loss with useful protection where the horse needs it most, making it a firm favourite on busy yards. The saddle patch also helps prevent rubbing and soreness under the girth and saddle during long hours of work.
Blanket Clip
A blanket clip horse keeps a blanket shaped area of coat over the back and quarters, with the neck and flanks clipped out. The retained coat keeps the loins warm while the horse works.
This popular clip suits horses in medium work. It removes coat from the sweatiest areas while leaving natural warmth across the back, which is ideal for horses that live out for part of the day. Such a clip often needs less rugging than a fully clipped horse, which many owners find convenient.
Trace Clip
A trace clip horse has hair removed from the underside of the neck, the chest, and the belly. The amount removed varies, giving low, medium, and high trace variations to match different workloads.
This practical clip suits horses in light to medium work that live out or spend long hours turned out. It removes sweat prone hair while keeping plenty of warmth on top, so it copes well outdoors even in wet weather.
Chaser Clip
A chaser clip is similar to a blanket clip but keeps more of the coat along the top of the neck. That extra strip of hair helps protect the neck muscles from the cold.
This clip suits horses in medium work that enjoy daytime turnout. It offers a tidy look with sensible warmth where it counts, giving a good middle ground between a blanket clip and a fuller clip.
Irish Clip
An Irish clip horse has hair removed from the front of the neck and the area behind the elbows, following a diagonal line across the body. It targets the areas that sweat first during light work.
This is a light clip, well suited to young horses and those in gentle work. It is quick to do and easy for a first time clipper to manage, so an Irish clip horse is a great starting point for beginners.
Bib Clip
A bib clip removes hair only from the front of the neck and the chest. It is the most minimal clip and the easiest to apply, even for a complete newcomer.
This clip suits horses in very light work that live out full time. It takes the edge off sweating without removing much natural protection, so your horse stays warm in the field.
Which Clip Is Best for Your Horse?
The best clip matches your horse’s workload, living arrangements, and your ability to rug appropriately. A hard working competition horse benefits from a full or hunter clip, while a lightly ridden native pony rarely needs more than a bib or trace clip. Consider how much time you can give to rugging and stabling before you decide, since a bigger clip means more daily management for you.
Here is the key thing. Always clip conservatively if you are unsure. You can remove more coat later, but you cannot put it back once it is gone, so a cautious first clip is always the wiser choice. If your horse changes workload during the winter, you can simply move up to a fuller clip when the time is right.
How to Clip Sensitive Areas Safely
Clipping sensitive areas safely means slowing right down and using smaller, quieter clippers wherever possible. The face, ears, legs, belly, and jaw all need extra patience, because these thin skinned regions feel every vibration and pull.
Think of it this way. The body is the easy part, and the sensitive areas are where real skill shows. Rushing these spots is the fastest way to frighten a horse and create clipping problems that linger for many sessions to come. Keep your voice low, your movements slow, and your expectations realistic, especially with a young or anxious horse.
Face
Work slowly and quietly around the face, using small trimming clippers for the best control. Support the head gently and avoid the eyes at all times.
Take frequent breaks and reward calm behaviour. A relaxed horse makes facial clipping far safer for everyone, so never force the pace if your horse tenses up. If the face proves too stressful, it is perfectly fine to leave it and focus on the body instead.
Ears
Never clip inside the ears, as the hair there protects against dust, water, and insects. Instead, gently fold each ear closed and tidy only the outer edges for a neat look.
Go slowly and keep the clippers quiet near the ear canal. Many horses are head shy, so patience here builds lasting trust and makes future clips easier.
Legs
Take great care around the legs, where the skin is thin and the tendons sit close to the surface. Use smaller clippers and follow the shape of each limb carefully.
Have a helper hold the leg steady if your horse fidgets. Leaving a little hair around the fetlock is fine and offers useful protection from mud and wet conditions. Never rush a leg, as sudden movements near thin skin and tendons carry a real risk of nicks.
Belly
Clip the belly with slow, careful strokes, as this ticklish area makes many horses flinch. Stand safely to the side and keep your body clear of the hind legs at all times.
Use gentle, feathering passes and pause if your horse grows tense. A calm, steady approach keeps this sensitive job safe and stops your horse from learning to dread it.
Under the Jaw
Clip under the jaw with light strokes, stretching the loose skin flat for a clean finish. This creased area collects sweat and benefits from a tidy clip.
Angle the clippers gently and take your time. Smoothing the skin as you go prevents nicks and gives an even result that blends neatly into the neck. Finish by brushing away loose hair so you can check the area for any missed patches or uneven lines.
Frequently Asked Questions
Is it better to clip a horse wet or dry?
Always clip a horse when it is completely clean and dry. Damp hair clogs the blades, pulls the coat, and gives a rough, uneven finish. A thorough groom and, if needed, a bath a day or two before clipping removes the grease that blunts blades. Dry, clean hair is the foundation of every smooth, professional clip, so never be tempted to clip a wet coat.
How long does it take to clip a horse?
A full body clip usually takes about one to two hours, depending on the horse’s temperament and the clip type. Experienced clippers working on a calm horse may finish a simple clip in under an hour. A nervous horse, a thick coat, or a detailed clip can extend the session considerably. Never rush, as a calm, unhurried pace gives the best and safest results every single time.
Can you clip a horse in summer?
Yes, you can clip a horse in summer, and it often helps certain horses. Animals with Cushing’s disease, those that struggle to sweat, and heavily coated types can all benefit from a summer clip. A light clip keeps these horses cooler and more comfortable in warm weather. Always adjust rugging and shade accordingly so your horse does not get too cold on cooler summer nights.
Can you clip a horse with dirty hair?
You should never clip a horse with dirty hair if you want a good result. Mud, grease, and dust blunt the blades almost immediately, causing lines, drag, and overheating. Dirty hair also makes the job slower and far less comfortable for your horse. Groom thoroughly first, and the whole process becomes quicker, smoother, and much kinder on your blades and your horse’s skin.
How often should a horse be clipped?
Most horses need clipping every three to six weeks through the winter to stay tidy. The exact frequency depends on how fast the coat regrows and how hard the horse works. Some horses need only a single clip in autumn, while horses in hard work may need several. Watch the coat and reclip whenever the hair grows long enough to cause sweating again during exercise.
Should I sedate a horse for clipping?
Sedation should only ever be given under veterinary guidance. Clipping sedatives are prescription medicines, so you must consult your vet before using them. For a genuinely difficult or clipping nervous horse, your vet can advise on safe options and correct dosing. Many horses learn to accept clipping through patient, gradual training, which is always the preferred long term approach for lasting calm.
What is the easiest clip for beginners?
A bib clip or a low trace clip is the easiest choice for beginners learning how to clip a horse. These clips remove hair only from flat, forgiving areas such as the chest and lower neck. They avoid the tricky contours and sensitive spots that catch out newcomers. Start small, build your confidence, and progress to larger clips as your skills and your horse’s tolerance grow.
How do I stop clipper lines?
To stop clipper lines, keep your blades sharp, clean, and well oiled, and overlap every stroke. Lines usually appear when blades are blunt, dirty, or pressed too hard against the skin. Clip against the hair growth with light, even pressure and steady, overlapping passes. Regular oiling and a slow, patient technique will give you the smooth, line free finish that every owner wants.
Clipping is a skill that improves with every session, so be patient with yourself and your horse as you learn how to clip a horse well. Start with a simple clip, use sharp and clean blades, and always put your horse’s comfort first. Keep these horse clipping tips close to hand, and each clip will feel calmer and look neater than the last. Good horse clipping aftercare, including proper rugging and warm shelter, keeps your freshly clipped horse healthy through the cold months. When in doubt about clipping, coat condition, or sedation, consult your veterinarian or a certified equine professional for advice tailored to your horse’s individual needs.