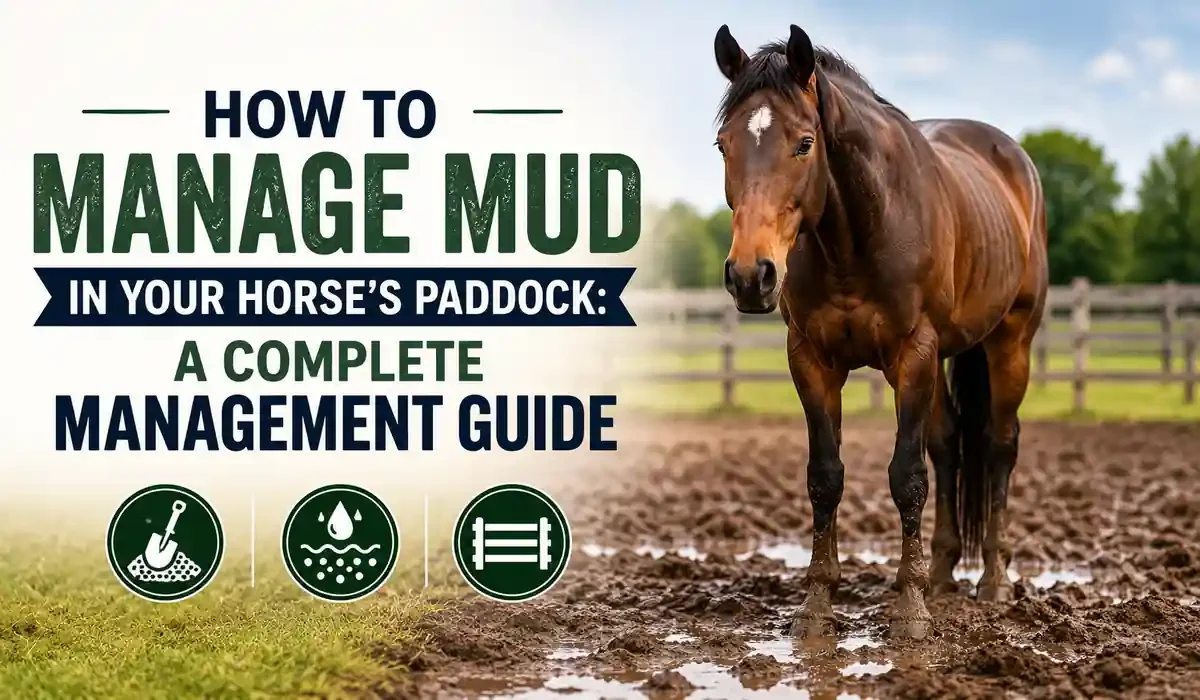
Learning how to manage mud in a horse paddock comes down to one principle. Control where the water goes before you try to repair the ground that water has already ruined. Most owners buy a load of gravel first and fix drainage last, which is exactly why the mud returns every spring.
This guide covers what causes paddock mud, the nine steps that actually solve it, the footing materials worth your money, and the maintenance routine that holds the ground firm through winter and the rainy season.
Mud is never only a cosmetic problem. It softens hoof horn, raises lameness risk, and quietly destroys the soil structure of your turnout area season after season.
Key Takeaways
- Mud forms when water has nowhere to drain and hoof traffic destroys the grass cover that once held the soil together.
- Fix drainage first. Gutters, downspouts, swales, and grading solve more mud than any load of gravel ever will.
- Geotextile fabric topped with 4 to 6 inches of angular gravel is the most reliable footing for gates, troughs, and feeders.
- A sacrifice area protects your pasture by concentrating wet season turnout into one stabilized space.
- Daily manure removal and hoof picking prevent thrush, mud fever, and the organic buildup that keeps ground soggy.
Why Mud Is a Problem in Horse Paddocks
Paddock mud is saturated topsoil that has lost its structure because hoof traffic compacted the ground and destroyed the grass cover that once absorbed rainfall. Without vegetation and drainage, water sits on the surface, mixes with manure and organic matter, and turns into deep, unstable footing that never fully dries.
Here is the key thing. Mud damages three separate systems at once: your horse, your soil, and your budget. Each problem feeds the next, which is why muddy paddocks get worse every year instead of stabilizing on their own.
Mud Threatens Hoof Health
Constant moisture softens the hoof capsule and lets bacteria reach tissue that would otherwise stay protected. The hoof horn absorbs water, loses rigidity, and grips shoes and nails less securely.
Thrush, a bacterial infection of the frog and its grooves, thrives in the airless, wet, manure rich conditions that muddy paddocks create. Mud fever, known clinically as pastern dermatitis, develops when skin on the lower leg stays wet long enough for the protective barrier to break down.
The American Association of Equine Practitioners consistently identifies clean, dry standing time and daily hoof cleaning as the foundation of hoof health. No supplement or topical product replaces dry ground.
Slippery Footing Raises Lameness Risk
Deep mud creates suction that pulls against tendons and ligaments every time your horse lifts a foot. That repeated resistance loads the soft tissue of the lower limb in ways firm footing never does.
Mud also hides what lies beneath it. A rock, a frozen hoof print, or a buried post fragment becomes invisible under six inches of slop. Add the slipping that happens on wet clay near a gate, and you have the two most common settings for pulled shoes, strained tendons, and pasture injuries.
Mud Destroys Soil and Pasture
Hooves in wet soil compact the ground and squeeze out the air pockets that roots and drainage both depend on. Penn State Extension notes that compaction and lost vegetative cover are the primary drivers of both mud formation and pasture decline on small horse properties.
Once grass cover is gone, rainfall carries topsoil, manure, and nutrients off the paddock instead of into it. That runoff creates erosion channels, invites weed species that tolerate compaction, and can carry nutrients into nearby waterways.
But here is where most horse owners go wrong. They treat mud as a surface problem and spread material on top of it. Surface treatments buy weeks. Understanding the cause buys years.
The Real Cost of Ignoring Mud
Mud charges you in three currencies. It charges veterinary and farrier bills for thrush, abscesses, mud fever, and lost shoes. It charges labor, because every chore in a swamp takes longer and every horse needs more grooming.
It also charges land value. Compacted, eroded soil takes years of rest and reseeding to recover, and a paddock that has lost its topsoil cannot grow the grass that would have prevented the mud in the first place. That is the trap. Mud creates the conditions that create more mud.
What Causes Mud in a Horse Paddock?
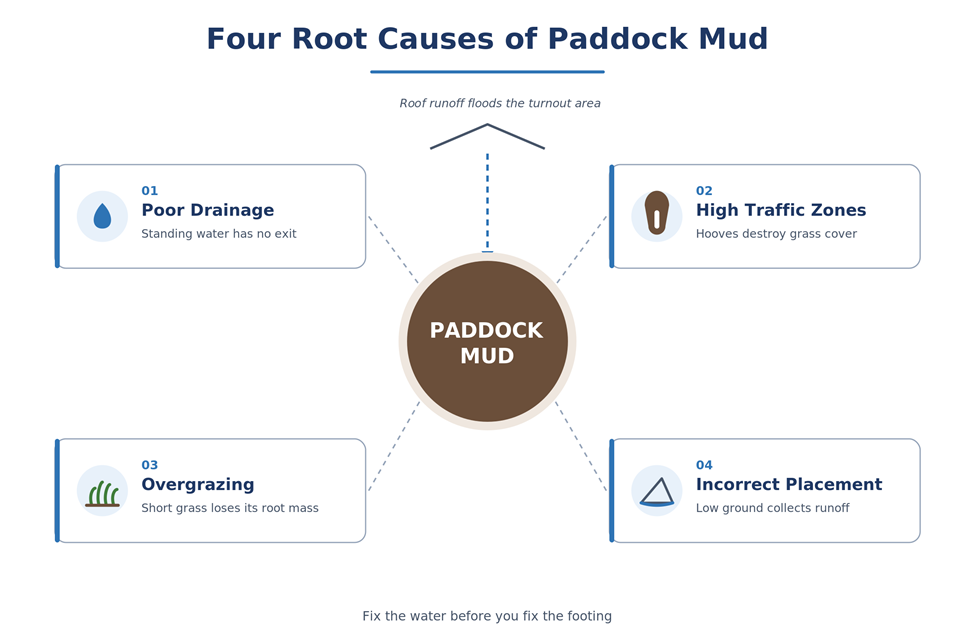
Mud forms when water has nowhere to go and the ground has nothing left to hold it together. Every muddy paddock in the world is some combination of four causes, and you cannot fix the footing until you know which ones you have.
Poor Drainage
Poor drainage is the single largest cause of paddock mud. Water arrives from rainfall, snowmelt, roof runoff, and uphill neighbors, and if the ground cannot shed it or absorb it, the water simply stays.
Three conditions make drainage fail. Flat ground gives surface water no direction to travel. Compacted subsoil and heavy clay refuse to absorb water downward. Barn roofs without gutters dump enormous volumes of clean rainwater directly onto the turnout area.
Think of it this way. A modest barn roof sheds thousands of gallons in a single storm. Every one of those gallons lands somewhere, and without gutters that somewhere is your paddock.
High Traffic Areas
Horses do not distribute their weight evenly across a paddock. They concentrate it in a handful of predictable places, and those places turn to mud first, every time.
The usual offenders are gates, water troughs, hay feeders, shelter entrances, and fence lines along the route to the barn. In these zones, hoof pressure destroys grass, compacts the soil, and churns the surface into a slurry that never recovers.
- Gate areas where horses gather and wait
- Water trough areas with constant standing and spillage
- Hay feeder areas where wasted hay traps moisture
- Shelter entrances where every horse enters on the same line
- Fence lines where horses pace or watch neighbors
Overgrazing
Grass is drainage infrastructure. Roots hold soil particles together, create channels for water to move downward, and lift moisture back into the air through the leaves.
When horses graze pasture shorter than roughly 3 to 4 inches, root mass shrinks and regrowth slows. University of Minnesota Extension guidance on horse pasture management recommends removing horses before grass drops below that height precisely because the root system, not the leaf, protects the soil.
Incorrect Paddock Placement
Some paddocks are muddy because of where they sit, not how they are managed. A paddock at the bottom of a slope collects water from every acre above it.
Low lying ground with a high water table stays saturated long after the rain stops. Paddocks placed directly against a barn wall absorb roof runoff. If your turnout area sits in a natural drainage path, no amount of gravel will outperform simply moving the water around it.
How to Diagnose Your Own Paddock
Diagnosis takes one rainstorm and a rain jacket. Walk the paddock while water is actively moving and record what you see, because a dry paddock hides every clue you need.
Mark five things on a rough sketch of your property. What you find determines which of the nine steps below matters most for you.
- Where water enters the paddock, including roof edges, gates, and uphill boundaries
- Where water pools and sits for more than an hour after rain stops
- Where water exits, or whether it has any exit at all
- Which traffic zones have lost their grass cover completely
- Whether the soil holds a boot print, a hoof print, or neither
How to Manage Mud in Your Horse’s Paddock Step by Step
Work these nine steps in order. The sequence matters more than the budget, because every step below depends on the water control you establish in the first two.
Step 1: Redirect Water Away from the Paddock
Start by removing clean water before it ever reaches the ground your horses stand on. This is the cheapest and highest impact action available to you.
Install gutters on every roof that drains toward the turnout area, then run downspout extensions or buried solid pipe to carry that water well past the paddock. Clean water diverted early never becomes dirty water you have to manage later.
Next, walk the property during a heavy rain and watch where water enters. A shallow diversion swale or a low earth berm placed uphill of the paddock intercepts that flow and routes it around your footing rather than through it.
The USDA Natural Resources Conservation Service treats this diversion of clean water as the first requirement of its Heavy Use Area Protection practice standard. Professionals start here. So should you.
- Gutter every roof surface that drains toward the turnout area
- Extend downspouts well beyond the paddock, using buried solid pipe where traffic crosses
- Cut a shallow diversion swale uphill to intercept surface flow
- Build a low earth berm where a swale is impractical
Step 2: Improve Drainage in Problem Areas
Good horse paddock drainage starts here. Once outside water is diverted, help the water that lands inside the paddock leave quickly. Standing water is the difference between damp ground and destroyed ground.
Grading is the primary tool. A gentle, consistent slope of roughly 2 to 4 percent moves surface water toward an outlet without creating erosion channels. Crowning a paddock so the center sits slightly higher than the edges achieves the same result across a larger area.
For persistent wet spots, a French drain, meaning a gravel filled trench with a perforated pipe at the bottom, collects subsurface water and carries it to daylight. Before you dig, confirm where the discharge will go. Sending water onto a neighbor’s land or into a stream can create both a legal problem and an environmental one, and many counties require permits for work near waterways.
- Grade to a steady slope of roughly 2 to 4 percent toward a safe outlet
- Crown large paddocks so the center sheds water toward the edges
- Fill low pockets that hold standing water after every storm
- Confirm your discharge point before digging any drain
Step 3: Stabilize High Traffic Zones
You do not need to stabilize the entire paddock. You need to stabilize roughly the ten percent of it where your horses spend most of their standing time.
Excavate the soft material from gates, troughs, feeders, and shelter entrances until you reach firm subsoil. Lay geotextile fabric across the entire excavation, then backfill with angular gravel and compact it in layers.
Size these pads generously. A gate pad of roughly 12 by 12 feet, a trough pad extending 10 feet in every direction, and a feeder pad wide enough that no horse stands off the edge will handle the traffic your horses actually generate. Undersized pads simply move the mud line a few feet outward.
- Gate pads of roughly 12 by 12 feet where horses gather and wait
- Trough pads extending about 10 feet in every direction
- Feeder pads wide enough that no horse stands off the edge
- Shelter entrance pads covering the full width of the opening
Step 4: Use the Right Footing Material
Geotextile fabric is a permeable synthetic textile installed between soft subsoil and gravel because it separates the two materials permanently. Water passes through it, gravel stays on top, and mud cannot pump upward, which is the single reason gravel pads either last a decade or vanish in one winter.
The bottom line is this. Angular gravel over geotextile fabric solves mud. Everything else on the market either supports that combination or substitutes for it in a narrow situation.
| Footing Material | Best Use | Strengths | Watch Outs | Relative Cost |
| Angular gravel or crushed stone | Gates, troughs, feeders, dry lots | Locks together, drains fast, carries load | Sinks into mud without geotextile beneath | Moderate |
| Geotextile fabric | Base layer under every gravel pad | Separates gravel from mud, spreads load | Must be fully covered, never left exposed | Low to moderate |
| Mud grids or paddock mats | High traffic pads and walkways | Fast to install, reusable, very stable | Uneven base causes rocking and lifting | High |
| Pea gravel | Loafing pads and rinse areas | Comfortable, gentle on hooves | Rolls underfoot, migrates, poor on slopes | Moderate |
| Stone dust or limestone screenings | Top dressing over an angular base | Smooth, firm walking surface | Holds water and packs tight if used alone | Low |
| Sand | Rinse areas and shelters only | Soft, drains quickly while clean | Serious sand colic risk near any feed | Moderate |
| Wood chips | Temporary relief in low traffic spots | Cheap, available, immediate | Rots into more organic mud within a season | Low |
Sand deserves a specific warning. Horses ingest sand while eating from the ground, and accumulated sand in the gut can cause colic. Never place sand where horses eat, and never use it as a general paddock surface.
Install in this order every time, because skipping a stage is what turns a gravel pad into a gravel graveyard.
- Excavate soft material down to firm subsoil
- Shape the base so it slopes toward an outlet
- Roll geotextile fabric across the full excavation with overlapped seams
- Backfill with angular gravel in layers, compacting each layer
- Top with screenings only where you want a smoother walking surface
Step 5: Create a Sacrifice Area
Horse sacrifice area mud control works by trading one small space for the health of every other acre. A sacrifice area, also called a dry lot, is a stabilized enclosure you intentionally give up to hoof traffic so the rest of your pasture survives. It is the most effective mud control decision available to a small farm.
Build it near the barn, on the highest and driest ground you have, sized so each horse has room to move without crowding. Many extension programs suggest planning for a minimum of several hundred square feet per horse and increasing that figure for turnout comfort. Stabilize the footing with geotextile and gravel exactly as you would a gate pad.
Use it on a rule, not a mood. Whenever a walking horse leaves a visible hoof print in the pasture, the soil is too soft and turnout belongs in the sacrifice area. The Rutgers Equine Science Center promotes this same logic in its guidance on protecting pasture during wet months.
- Site it on the highest and driest ground near the barn
- Divert every roof and surface water source away from it
- Stabilize the footing with geotextile fabric and angular gravel
- Remove manure daily, because confinement concentrates it fast
Step 6: Move Feeders and Water Troughs
Every feeder and trough is a mud generator, because it holds your horse in one spot for hours a day. You have two choices: stabilize the spot or keep moving it.
Place permanent troughs on gravel pads built over geotextile, and set the trough so overflow drains away from the standing area rather than pooling under it. Where feeders are portable, rotate them across the paddock so no single patch absorbs an entire winter of traffic.
Placing troughs on the fence line between two paddocks lets one stabilized pad serve both spaces, which halves your material cost and your maintenance.
- Set troughs on gravel pads with overflow draining away from standing areas
- Rotate portable hay feeders weekly through the wet months
- Never place feed on sand or on bare, unstabilized soil
Step 7: Manage Manure and Organic Matter
Manure and wasted hay are not just mess. They are the raw material of mud. Organic matter holds water like a sponge, blocks drainage, and feeds the bacteria that cause thrush.
Remove manure from paddocks and sacrifice areas daily. A horse produces roughly fifty pounds of manure every day, and in a confined dry lot that volume becomes the top layer of your footing within weeks.
Use feeders that limit hay waste, and rake up leftover hay before it mats into the surface. Compost what you collect rather than spreading fresh manure onto pasture, and store the pile on a surface that will not leach into your drainage.
- Pick manure from paddocks and sacrifice areas every day
- Rake wasted hay before it mats into the surface
- Compost collected manure rather than spreading it fresh onto pasture
- Store the pile away from drainage paths and waterways
Step 8: Rotate Pastures When Possible
Rotation gives grass the rest it needs to rebuild the root mass that keeps soil drained and stable. Continuous grazing on a single field guarantees mud eventually.
Divide larger pastures into sections with temporary electric fence and move horses when grass approaches 3 to 4 inches. Rest each section until regrowth reaches roughly 6 to 8 inches before returning horses to it.
Here is the rule that overrides all others. Never turn horses onto saturated ground, even rested ground. One afternoon on wet soil can undo an entire season of rotation.
- Divide pasture into sections using temporary electric fence
- Move horses off a section when grass reaches 3 to 4 inches
- Rest each section until regrowth reaches roughly 6 to 8 inches
- Keep horses off any section while the ground is saturated
Step 9: Protect Your Horse Hooves During Mud Season
Pick out every hoof daily during wet months, paying particular attention to the collateral grooves alongside the frog where thrush establishes itself.
Watch the pasterns and heels for scabs, crusting, swelling, or heat, which are the early signs of mud fever. Clip long feathering if it traps moisture, and let the legs dry fully before applying any product, because sealing wet skin makes the problem worse.
Give your horse dry standing time every day, even a few hours in a stall or on a stabilized pad. Keep your farrier on schedule, because wet horn holds shoes poorly and small imbalances become lameness faster in mud than in any other footing.
- Pick out all four hooves daily, cleaning the grooves beside the frog
- Check pasterns and heels for scabs, heat, swelling, or crusting
- Let legs dry completely before applying any topical product
- Provide dry standing time on a stabilized pad or in a clean stall
- Keep farrier visits on schedule, because wet horn holds shoes poorly
Seasonal Mud Control for Winter and the Rainy Season
Mud is seasonal, so your management should be too. The work that saves your paddock in February happens in September, and the mistakes that ruin it happen during thaw.
Autumn Preparation
Autumn is when permanent work is possible, because the ground is dry enough to excavate and grade. Clean your gutters, extend your downspouts, and repair any swale that silted in over summer.
Stabilize at least one traffic zone before the rains arrive. Then stockpile bedding, gravel, and wood chips while trucks can still reach your paddock without sinking.
Winter and Freeze Thaw Cycles
Winter paddock mud management is mostly about restraint. Frozen ground carries weight beautifully, but the moment it thaws the top few inches turn to soup over a solid frozen layer beneath.
Keep horses in the sacrifice area during every thaw, and never turn out onto pasture that gives underfoot. Frozen hoof prints also become ankle traps once they harden, so smooth badly churned ground before the first hard freeze.
Spring Thaw and the Rainy Season
Spring combines snowmelt, saturated subsoil, and grass that has not yet rebuilt its root mass. It is the single most destructive period of the year for pasture.
Hold horses in the dry lot until the pasture soil is firm enough that a walking horse leaves no print. Rushing turnout by two weeks routinely costs an entire grazing season of grass cover.
Quick Fixes Versus Long Term Mud Control
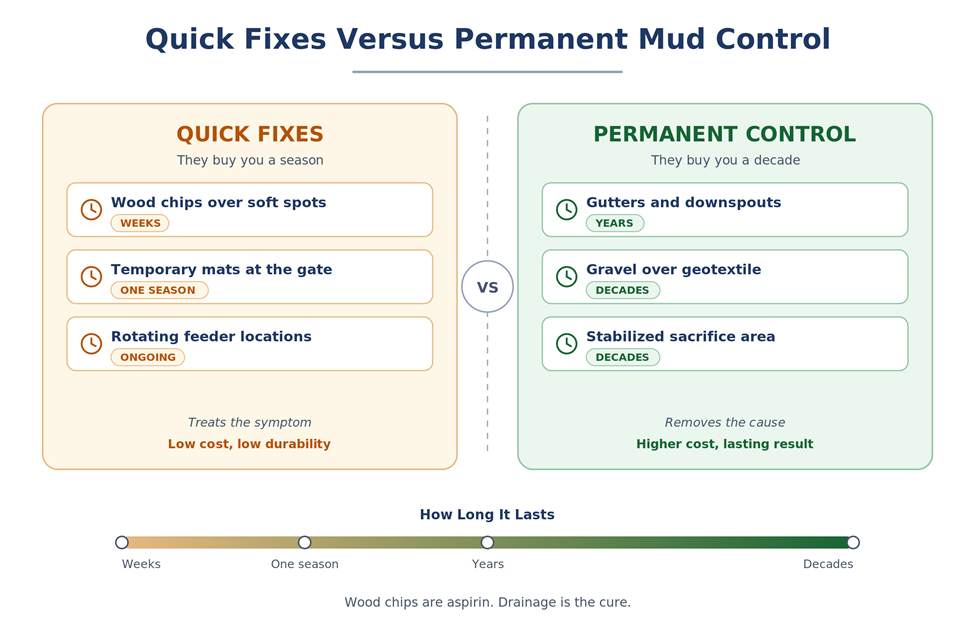
Horse paddock mud control operates on two timelines. Quick fixes buy you a season. Permanent fixes buy you a decade. Both belong in a real plan, because most owners cannot excavate in February when the paddock is already a swamp.
Quick Fixes
Use these when you need relief now and the ground is too wet to work. Accept that you are managing a symptom, and plan the permanent repair for the first dry stretch.
- Spread wood chips or coarse shavings over soft standing areas to absorb surface moisture
- Lay temporary rubber mats at the gate to give horses firm footing where they gather
- Rotate portable feeders weekly so traffic damage spreads instead of concentrating
- Remove manure and wasted hay daily to stop organic matter from thickening the surface
- Add downspout extensions, which take an hour and immediately remove roof runoff
Long Term Fixes
These are the projects that end the annual mud cycle. Schedule them for dry weather, and expect the drainage work to deliver more improvement per dollar than the footing work.
| Approach | What It Does | Time to Install | How Long It Lasts | Cost |
| Wood chips over soft spots | Absorbs surface moisture | Hours | Weeks | Low |
| Temporary mats at the gate | Gives firm footing where horses gather | Hours | One season | Low |
| Rotating feeder locations | Spreads traffic damage across the paddock | Minutes | Ongoing | None |
| Daily manure and hay removal | Reduces organic matter in the surface | Daily | Ongoing | None |
| Gutters and downspout extensions | Removes roof runoff before it lands | One weekend | Years | Low |
| Swales and regrading | Moves surface water off the paddock | Days | Years | Moderate |
| Geotextile and gravel pads | Creates all weather footing in traffic zones | Days | 10 or more years | High |
| Sacrifice area with stabilized base | Protects pasture through every wet month | Weeks | 10 or more years | High |
Think of it this way. Wood chips are aspirin. Drainage is the cure. You can take both, but only one of them fixes anything.
Your Final Mud Management Checklist
Work this list in order. Each item assumes the one above it is already complete, which is why owners who start at item four keep repeating item four.
- Walk the paddock during heavy rain and mark every place where water enters, pools, and exits.
- Install gutters and downspout extensions on every roof that drains toward the turnout area.
- Grade or cut a swale so surface water leaves the paddock instead of crossing it.
- Lay geotextile fabric and 4 to 6 inches of angular gravel on gates, troughs, feeders, and shelter entrances.
- Establish a sacrifice area and use it whenever a walking horse leaves a hoof print in the pasture.
- Remove manure and wasted hay daily so organic matter never becomes your top layer of footing.
- Pick hooves daily through mud season and keep the farrier on a schedule set before problems appear.
Review the list twice a year, once before the first autumn rains and once as snowmelt begins. Mud control is a maintenance habit, not a construction project you complete and forget.
Keep a simple written record of what you fixed and when, along with photographs taken during heavy rain. Over three seasons that record shows you exactly which repairs held, which zones still fail, and where your next load of gravel belongs. Guesswork is expensive. Documentation is free.
Horse Paddock Mud Management FAQs
What is the fastest way to fix a muddy horse paddock?
The fastest meaningful fix is diverting roof runoff. Adding gutters and downspout extensions takes a few hours and removes thousands of gallons per storm from your footing. For immediate relief underfoot, lay rubber mats at the gate and spread coarse wood chips on soft standing areas, then schedule the drainage work for the first dry stretch.
What is the best footing for a muddy horse paddock?
Angular gravel installed over geotextile fabric is the best footing for a muddy horse paddock. The fabric stops mud from pumping up into the stone, and the angular edges of crushed rock lock together into a firm, draining surface. Depth of 4 to 6 inches over compacted subsoil handles normal turnout traffic in high use zones.
Can horses stand in mud all day?
No. Prolonged standing in mud softens hoof horn, invites thrush and mud fever, and strains soft tissue through constant suction. Horses tolerate short exposure well, but they need dry standing time every day. If your paddock offers no dry ground at all, a stabilized sacrifice area or several hours in a clean stall becomes a health requirement rather than a convenience.
How do I stop mud around a horse water trough?
Build a stabilized pad. Excavate the soft soil, lay geotextile fabric, and backfill with compacted angular gravel extending roughly 10 feet around the trough on every side. Position the trough so overflow and spillage drain away from the standing area, and place it on a fence line where one pad can serve two paddocks.
Is gravel safe for horse paddocks?
Yes, when you choose the right stone and install it correctly. Angular crushed stone compacts into a stable surface that most horses handle comfortably, including barefoot horses, once the top has settled. Avoid large, loose, rounded rock, which rolls underfoot and bruises soles. Always install geotextile beneath gravel, or the stone will disappear into the mud.
How do I prevent mud in winter paddocks?
Winter paddock mud management depends on work completed in autumn. Divert roof water, confirm your grading sheds surface water, and stabilize your traffic zones before the ground freezes. Through winter, keep horses in a sacrifice area during thaws, remove manure daily, and never turn out on saturated ground during freeze and thaw cycles when soil structure is weakest.
How do I make a sacrifice area for horses on a small farm?
Choose the highest, driest ground near your barn and fence an enclosure large enough for your horses to move freely. Strip the topsoil, install geotextile fabric across the base, and add compacted angular gravel. Divert all roof and surface water away from the enclosure, then remove manure daily. Use it whenever pasture soil is soft.
What are cheap ways to fix a muddy horse paddock?
The cheapest effective fixes cost labor rather than money. Divert roof runoff with basic downspout extensions, hand cut a shallow swale uphill of the paddock, rotate feeders and hay placement weekly, and remove manure daily. Stabilize only your worst traffic zone the first year, then add one gravel pad each season as budget allows.
Managing mud in your horse’s paddock is a drainage problem wearing a footing costume. Move the water first, protect the ground your horses stand on second, and maintain both with daily manure removal and honest pasture rest. Owners who follow that order stop rebuilding the same gate every spring.
Start with the cheapest step you have not done yet. Walk your property in the next hard rain, follow the water, and write down what you see. That single hour tells you more about how to manage mud in a horse paddock than any product catalog will.
Every property drains differently, and every horse responds to wet conditions differently. Before making changes to footing, turnout schedules, or hoof care during mud season, consult your veterinarian, your farrier, or a certified equine nutritionist for advice tailored to your horse’s individual needs.