Horse pasture soil testing helps you decide whether your paddocks need lime or fertilizer and how much to apply. This guide covers collecting a representative sample, interpreting the report and scaling recommendations to your own grazing area.
You will learn how to pull a representative sample, what soil pH and nutrient ratings actually mean, and how to turn a recommendation written per acre into pounds for your own small paddock.
For grazing layout, recovery and routine maintenance, start with horse pasture management for small properties.
Most horse owners skip the test and guess instead. Guessing wastes money on fertilizer the grass cannot use, and it leaves acid soil quietly capping your forage yield for years.
Key Takeaways
- A representative test guides lime and fertilizer decisions for each management area.
- Use your laboratory’s sampling depth and handling instructions.
- Follow the pH target for the actual forage species.
- Exclude unusual nutrient hotspots or test them separately.
- Distinguish soil nutrient measurements from nutrient and product application rates.
What Horse Pasture Soil Testing Actually Measures
A routine pasture fertility test commonly measures soil pH and extractable nutrients such as phosphorus and potassium. The panel and lime-requirement method vary by laboratory. It does not measure forage protein or sugar; some regions use separate nitrogen tests.
Horse pasture soil testing is a laboratory analysis of mixed soil cores taken from your grazing land. It reports acidity and plant available nutrient levels, then converts those numbers into a lime and fertilizer recommendation for the specific forage you told the lab you are growing.
Treat the report as a decision tool calibrated to your region and crop. Recommendations still need to account for application history, forage type and practical field conditions.
The Four Numbers That Drive Every Decision
Four values on the report carry almost all of the practical weight for a grazing paddock.
Soil pH describes acidity or alkalinity, with 7.0 neutral. A target around 6.0 to 6.5 is common for many pasture grasses, but legumes and other species may have different requirements.
Buffer pH, sometimes printed as a lime requirement index, estimates how hard your soil will resist a pH change. Soil phosphorus and soil potassium are reported as plant available levels, usually in parts per million (ppm), and each gets a rating such as low, optimum or above optimum.
The Supporting Numbers and Why Your Lab Matters
Calcium, magnesium, organic matter and cation exchange capacity provide additional context where reported. Their importance depends on the soil, crop and test method.
Your soil testing lab also decides how those numbers are produced. Each lab uses an extraction method calibrated to the soils in its region, so the same paddock can return slightly different figures from two labs without either one being wrong.
That is the argument for choosing a regional lab and staying with it. Comparing this year’s result against a report from a different lab tells you very little, because you are comparing two methods as much as two years.
What the Test Does Not Measure
Your soil test will not tell you whether your grass meets your horse’s calorie, protein or sugar needs. That takes a separate forage analysis of clipped plant material.
The test also says nothing about plant species, weed pressure, compaction or drainage. Think of it this way. Soil testing fixes the chemistry under the sward, while grazing management fixes everything happening above it.
Poor ground cover can also reflect excessive grazing pressure. Our guide to how many acres a horse needs separates forage capacity from turnout space.
That distinction matters because fertility is often blamed for problems it did not cause. A paddock thinning out under heavy traffic will not improve because you spread potash on it, and a soil test is the fastest way to rule fertility in or out before you spend money.
When Is the Best Time to Test Horse Pasture Soil
Fall is often convenient because it gives time to plan amendments before the next growing season. However, sampling can be useful at other times when the lab’s conditions are met and there is time to act on the result.
Spring sampling is still far better than no sampling. The practical rule on when to test horse pasture soil is simple: sample whenever you have time to act on the results before the next growing season.
Sample at a Consistent Time of Year
Here is the key point. Consistency beats the calendar date. University of Georgia Extension advises testing at the same time of year each time, so your results stay comparable across cycles and you can actually see a trend rather than seasonal noise.
Nutrient levels and pH drift through the season as plants take up nutrients and rainfall moves them. A spring sample and a fall sample from the same paddock can read differently even when nothing has changed.
Never Sample Right After an Application
Wait after spreading anything. Guidance published through Ohio State extension channels is blunt on this point: never sample immediately after applying fertilizer, lime or manure.
Ask the laboratory how long to wait after a recent application and record the product, rate and date. Appropriate timing depends on the amendment, incorporation and purpose of the test.
How Often to Test Pasture Soil
Every three years suits a typical horse pasture under light to moderate stocking. University of Georgia Extension recommends a three year cycle for lawns and pastures with no visible problems, while Kansas State Research and Extension puts hay and grazing ground at every three to four years.
Test more frequently when your adviser recommends it for corrective work, intensive nutrient inputs or vulnerable soils. A stable field may not need annual testing.
How to Collect a Horse Pasture Soil Sample in 6 Steps
Sample collection is where most reports go wrong, not in the lab. The analysis is precise, so a sloppy sample simply gives you a precise answer to the wrong question.
But here is where most horse owners go wrong. They grab one scoop of dirt near the gate, where horses loaf and manure concentrates, and then follow a recommendation built on a badly skewed number.
The mechanics of how to take a pasture soil sample are simple, and the six steps below cover all of it. Learning how to test horse pasture soil properly takes about twenty minutes per paddock.
1. Get a Soil Test Kit and Check Your Lab’s Instructions
Start by picking your lab, then follow its instructions rather than generic advice. Most state extension offices supply kits, sample bags or boxes, and submission forms, and many will loan you a soil probe at no cost.
Lab methods differ by region. The extraction chemistry used in the Mid Atlantic is calibrated for different soils than the method used in the Southeast, so a nearby lab gives you a recommendation that actually fits your ground.
Read the form before you walk out the door. You will usually need to state the crop, the field size and whether the stand is established or being planted.
2. Divide the Pasture Into Areas With Similar Soil and Drainage
Treat each distinct area as its own sample. One composite sample should represent ground that shares the same soil type, slope, drainage and management history.
Use the maximum sampling-area size recommended by the lab. Split fields with materially different soils, drainage, topography or management; one large uniform area may be sampled differently from several small contrasting paddocks.
Fence lines are useful boundaries, but soil and management differences should determine sampling areas. Similar paddocks may sometimes be combined if the laboratory agrees.
3. Keep Gateways, Feeding Areas and Manure Piles Out of the Main Sample
Exclude every hotspot from your composite sample. University of Florida IFAS Extension specifically warns against sampling manure or hay storage areas and spots where lime was previously stockpiled.
On a horse property the list is longer than on a crop farm. Stay away from gateways, water troughs, shade trees, round bale rings, run in shed aprons, old muck heaps, eroded strips and field edges.
The bottom line is this. Those areas are real, but they are not representative, and including them tells the lab your whole pasture is richer than it is.
4. Walk Across Each Area and Collect Soil at the Recommended Depth
Collect the number of cores and sampling depth specified by your selected laboratory, covering the area in a zigzag or similar pattern. Some programs use about 4 inches for established pasture; others use 6 inches or more. Do not substitute one program’s depth for another.
Consistent depth is essential because laboratories calibrate recommendations to a specific sampling method. Mixing depths can distort comparisons and nutrient ratings.
Scrape surface thatch and manure off each spot before you push the probe in. Collect from across the area, not along one fence line.
5. Mix Soil From the Same Area in a Clean Bucket
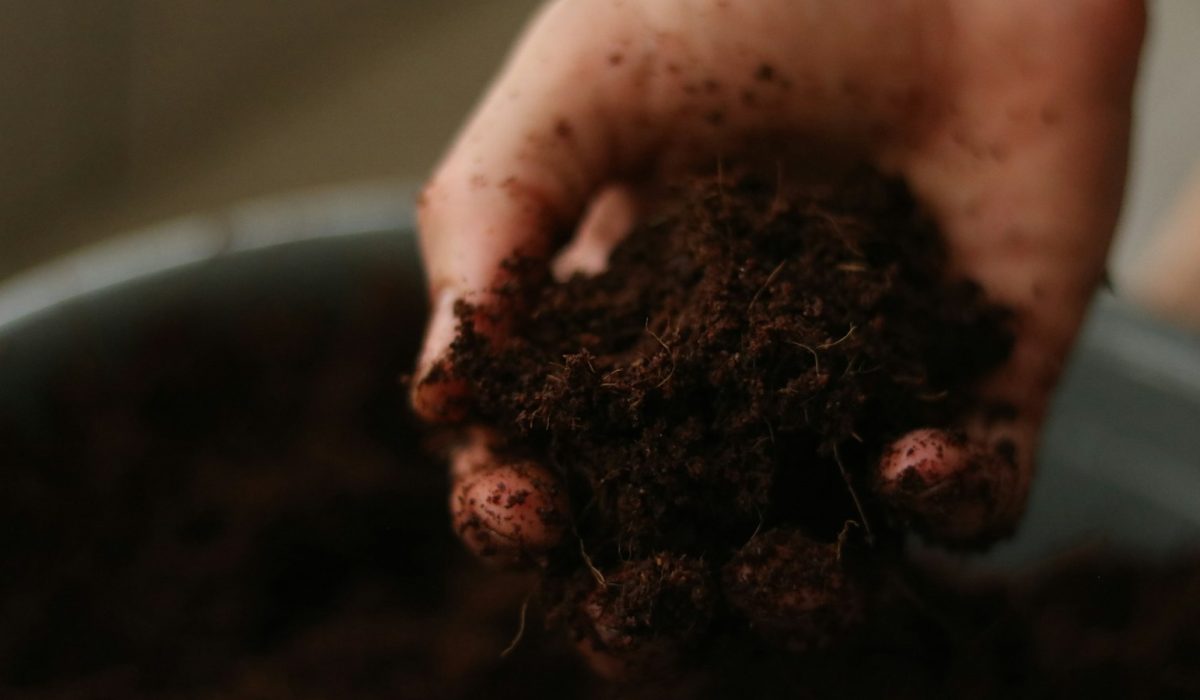
Combine the cores from one area in a clean plastic bucket and mix them thoroughly before you fill the bag. This is what creates a composite soil sample, and the mixing step is not optional.
Avoid galvanized or rubber buckets, which University of Florida IFAS Extension notes can contaminate your sample with zinc. A clean plastic bucket protects the result.
Pick out stones, roots and plant debris. Let wet soil air dry in the shade on a clean surface, and never heat it to speed that up.
6. Label Each Bag and List Your Pasture Grasses or Legumes on the Lab Form
Give every bag a paddock sample ID that you will still recognize in two years. Write it on the bag and on the form, and keep a note of which paddock each ID refers to.
Now the part owners forget. Tell the lab what you are growing. A grass stand and a grass plus legume mix get different target pH values and different nitrogen guidance, so the crop code you select changes the entire recommendation.
Include the acreage of that specific area. It is how the lab frames the rate, and it saves you arithmetic later.
How to Read Your Horse Pasture Soil Test Report
Read the report in layers rather than hunting for the biggest number. Confirm the field and depth first, then pH, then each nutrient rating, and only then the recommendation column.
Reports are not standardized between labs, so layout and terminology shift. The sequence below works on almost any format, including reports from the Penn State Agricultural Analytical Services Laboratory and state department of agriculture labs.
Knowing how to read a pasture soil test report is a matter of sequence rather than chemistry. Work through these six checks in order and you will reach a defensible decision on lime and fertilizer every time.
1. Match the Sample ID to the Correct Paddock
Check the sample ID, field name and acreage before you read anything else. A recommendation applied to the wrong paddock is worse than no recommendation, because you pay for it twice.
Confirm the crop code too. If you asked for established grass pasture and the report says planting pasture, the nitrogen and phosphorus guidance will not match your situation.
2. Compare Your Soil pH With the Target for Your Pasture
Find your measured pH and compare it against the target for your forage, not against neutral. Understanding what soil pH means for horse pastures is straightforward: it controls how much of your existing nutrient stock the plants can actually reach.
When pH is below the target for the selected forage, growth and response to fertilizer may be limited. The size of that response depends on the actual soil and crop.
| Pasture situation | How to choose the target pH |
|---|---|
| Grass stand | Use the lab’s species-appropriate recommendation; 6.0 to 6.5 is common for many grasses |
| Grass-legume mixture | Use a target that accounts for the legume; requirements vary |
| New seeding | Specify the intended species and establishment purpose |
| Established pasture | Use the appropriate crop code and local calibration |
Target values vary by lab, so follow your own report.
3. Find the Phosphorus and Potassium Ratings
Locate soil phosphorus and soil potassium, and read both the number and the rating beside it. The number is usually in parts per million (ppm), and the rating translates that number into agronomic meaning for your crop.
Use your laboratory’s rating rather than applying a ppm threshold from another region. Extraction methods and crop targets differ, so identical numbers can mean different things on different reports.
Here is something worth knowing. Phosphorus is immobile in soil and builds up slowly, while potassium moves and depletes faster under grazing and hay removal.
4. Understand What Low, Optimum and High Ratings Mean
Nutrient ratings tell you whether applying more will produce more forage. The four bands below cover most reports, and they drive the yes or no decision on every bag of fertilizer.
| Rating | General meaning | Practical action |
|---|---|---|
| Low | A response to added nutrient may be likely | Follow the crop-specific recommendation |
| Optimum | Generally adequate under the lab’s calibration | Follow maintenance guidance, if any |
| Above optimum | Additional nutrient may provide little benefit | Follow reduced or zero recommendation |
| Excessive | Unnecessary additions may increase risk | Avoid further additions unless specifically advised; review inputs |
An optimum rating still earns a small maintenance recommendation at many labs, because grazing and hay removal export nutrients every season.
Where forage potassium matters for a horse’s health, discuss forage testing and ration management with your veterinarian. Soil results alone do not establish whether a particular horse can safely eat the grass.
5. Distinguish Measured Nutrient Levels From Recommended Application Rates
This is the single most expensive misreading on the page. The measured level is what is in your soil, reported in ppm. The recommended rate is what to spread, reported in pounds per acre.
A report showing 30 ppm phosphorus and a recommendation of 40 pounds of phosphate per acre is not contradicting itself. One column describes your soil, the other prescribes your action.
Check whether the report expresses rates as elemental nutrients, phosphate (P2O5), potash (K2O), or actual product. Lime recommendations also depend on the product’s neutralizing value; ask the lab how to adjust the stated rate.
6. Check Whether the Lab Recommends Lime, Fertilizer or Neither
Read each recommendation and its units. Some reports include nitrogen guidance derived from crop needs rather than a direct nitrogen measurement. A recommended nutrient rate may be zero.
A low pH can indicate a need for lime, but pH alone does not determine the amount. Follow the lab’s lime-requirement method and product-quality adjustment.
Buffer tests and other acidity measurements help estimate lime requirement. Interpret the index using that lab’s method, not a formula copied from a different laboratory.
Worked Example: What if Soil pH Is Low but Phosphorus Is Already High
In the hypothetical example below, the report recommends lime, no phosphate and a specified potash rate. Low pH and high phosphorus alone do not establish that potassium is deficient.
Think of it this way. Years of manure returning to the same paddock build phosphorus up while rainfall steadily strips the pH back down.
The Report in Front of You
This is an illustrative example, not an actual soil report or a rate to apply to your own paddock.
Assume a one-acre paddock has pH 5.6 against its lab’s target of 6.5. The laboratory separately recommends 2 tons of a specified lime equivalent per acre, rates phosphorus above optimum and potassium below optimum, and supplies a potash recommendation. The lime rate is not calculated from pH 5.6 alone.
What You Actually Do
Plan lime and nutrient applications using the report and local advice. Follow any maximum single-application rate and adjust for the actual lime product.
For this example, do not add phosphate. Apply potash only at the report’s recommended rate, and use the appropriate nitrogen guidance for the forage and its other nutrient inputs.
Ask when to retest after corrective applications. Use agricultural limestone as specified, not quicklime or hydrated lime. Follow product precautions, keep horses clear during application and obtain advice on safe return.
Why This Pattern Repeats on Horse Farms
Horses concentrate nutrients wherever they stand and drop manure, which means phosphorus accumulates unevenly. Meanwhile acidity builds from rainfall, nitrogen fertilizer and natural soil processes.
Nutrient patterns differ between fields. Testing shows whether this example fits your property; do not assume every horse paddock is high in phosphorus or low in potassium.
How to Convert a Lab Recommendation Per Acre to Your Paddock Size
Divide your paddock’s square footage by 43,560 to get acres, then multiply by the recommended rate. That single calculation is the whole method, and it is how to calculate fertilizer for a small paddock without over applying.
But here is where small acreage owners lose money. Over application is the common error. Spreading a full acre rate on a half acre paddock doubles your cost, risks runoff, and can push nutrients into the excessive band.
The Five Step Calculation
- Measure the paddock; length multiplied by width gives area only for a rectangle. Divide irregular areas into shapes or use a mapping tool.
- Divide that figure by 43,560, the number of square feet in one acre, to get your acreage.
- Multiply your acreage by each recommended per-acre rate, keeping nutrient rates separate from product rates.
- Divide the nutrient pounds by the decimal percentage of that nutrient in your chosen product to get pounds of product.
- Check your spreader setting against the product label and calibrate on a measured strip.
A Worked Conversion
Say your paddock measures 300 feet by 150 feet. That is 45,000 square feet, which divided by 43,560 gives 1.03 acres.
Your report recommends 2,000 pounds of limestone per acre, so you need about 2,060 pounds, or roughly one ton.
Now the fertilizer. The report also calls for 40 pounds of potash per acre, and using a product analyzed as 0 0 60 you divide 40 by 0.60 to get 67 pounds of product per acre, which works out to about 69 pounds for this paddock.
Use sensible measurement precision and adjust lime for its neutralizing value as instructed. Do not deliberately round above a recommended application rate.
Buying and Spreading Practicalities
Bulk lime is cheaper per ton than bagged lime, but most small horse properties cannot take a bulk load. Ask neighboring farms who they use, and share a delivery where you can.
Time applications to the forage’s active growth, soil conditions and local recommendations. Avoid frozen, saturated ground and heavy-rain forecasts; nitrogen timing differs between cool- and warm-season systems.
Calibrate your spreader before you start. Weigh out the product for a measured strip, run it, and adjust the setting until the strip takes the right amount, because an uncalibrated spreader turns a careful calculation back into a guess.
Common Pasture Soil Testing Mistakes That Cost You Forage
Most wasted money traces back to four avoidable mistakes, and none of them happen in the lab. They happen in the paddock, on the submission form, or in the shed when the recommendation gets ignored.
Here is something worth knowing. A perfect report you never act on produces exactly the same forage as no report at all.
Sampling the Convenient Spots
The most common error is sampling where walking is easy. A sample pulled along a fence line, around a gateway or beside a water trough reflects horse traffic rather than your pasture.
The fix is simple. Walk the whole area in a zigzag and take your cores as they fall. If a spot looks unusual, leave it out or sample it separately as a problem area.
Treating the Whole Farm as One Field
Averaging unlike ground gives you a rate that fits nowhere. A wet bottom paddock and a dry hilltop paddock genuinely need different lime, and a single blended sample hides both needs.
The fix costs very little. Sample each grazing unit separately, keep the acreage of each one on record, and you will spend less overall because you stop treating fields that do not need treating.
Buying a Balanced Bag Out of Habit
Do not choose a balanced fertilizer automatically. Some paddocks already have enough phosphorus, while others need it. Buy the nutrients the report actually recommends.
Buy to the recommendation instead. If the report asks for nitrogen and potash but no phosphate, a product supplying only those two is cheaper and better for nearby water.
Ignoring the Lime Because It Is Not Exciting
Lime is the least glamorous and most valuable line on the report. Penn State Extension describes liming as one of the most cost effective ways to improve a pasture with low soil pH, yet it is the recommendation owners most often postpone.
The bottom line is this. Nitrogen applied to acid soil is partly wasted money, because the grass cannot respond fully until pH recovers.
Frequently Asked Questions About Horse Pasture Soil Testing
Can I Use a Shovel Instead of a Soil Probe?
Yes, but you have to be careful about shape. A soil probe pulls a uniform core, while a shovel tends to produce a wedge that holds too much surface soil and too little from depth.
Kansas State Research and Extension recommends digging a hole first, then cutting an even vertical slice to the correct depth. Many extension and conservation district offices loan probes at no charge, which is the simpler solution.
Can I Combine Soil From Two Horse Paddocks in One Sample?
Only if they genuinely match. Two paddocks can share one composite sample when they have the same soil type, drainage, slope, grazing pressure and fertilizer history.
In practice they rarely do on a horse farm, because one paddock usually carries more horses or more manure. Separate samples cost a few dollars each and give you two usable prescriptions instead of one average that fits neither field.
Should I Test a Bare Patch Separately From the Rest of the Field?
Yes. Sample a distinct bare patch separately if you want to investigate its chemistry. A routine soil fertility test does not measure compaction, drainage or every possible cause of bare ground.
Label the problem-area sample and compare it with healthy ground. Inspect physical conditions separately and ask an adviser whether additional testing is needed.
Can I Take a Soil Sample After Spreading Manure or Fertilizer?
Recent applications can distort a representative fertility sample. Contact the laboratory for timing advice rather than using one waiting period for every amendment.
Provide dates, rates and products on the form if the field has recently been treated. The laboratory can advise whether to sample now or wait.
Why Doesn’t My Soil Test Report List Nitrogen?
Many routine panels do not use a nitrogen measurement because available nitrogen changes rapidly and is difficult to predict from a standard sample.
Nitrogen testing can still be useful in some regions and situations, with specific sampling and handling requirements. Ask your lab whether its recommendation is test-based or calculated from crop needs.
Does a Soil Test Tell Me Whether the Grass Meets My Horse’s Nutritional Needs?
No. A soil test describes the growing medium, not the feed value of the forage standing on it.
For that you need a forage analysis, where clipped plant material is tested for protein, fiber, energy and sometimes sugar and starch. Owners managing laminitis risk or metabolic conditions should discuss forage testing with their veterinarian, since pasture sugar levels shift with season, time of day and weather.
The two tests do work together, though. Correcting pH and fertility raises both the amount and the quality of forage your field grows, so the soil report improves the raw material that a forage analysis then measures.
How Often Should I Retest My Horse Pasture?
Every three years is a sound default for a stable, lightly grazed pasture. Move to every two years if you spread manure regularly, graze intensively, farm sandy soil, or are actively correcting pH.
Retest at establishment too, before you seed a renovated field. Keep the sampling month consistent so you build a usable record rather than a set of unrelated snapshots.
If you are preparing new grass, follow the full sequence in how to reseed a horse pasture.
A useful soil test starts with a representative sample. Divide unlike areas, collect enough cores at your laboratory’s specified depth, exclude nutrient hotspots and label each sample clearly.
When the report lands, read it in order: field, pH, ratings, then recommendations. Lime what needs lime, skip what already reads above optimum, and convert every per acre rate to your real paddock size before you buy a single bag.
Your local extension service or laboratory can help interpret the report; fees and support vary. Keep results and application records together so future tests show a meaningful trend.
One last point. For questions about what your pasture means for an individual horse, including grazing time, body condition and forage sugar concerns, consult your veterinarian or a certified equine nutritionist for advice tailored to your horse’s individual needs.
Sources and Further Reading
- University of Minnesota: Taking soil samples from horse pasture
- University of Missouri: Soil sampling pastures
- Penn State: Liming and fertilizing horse pastures
- University of Georgia: Soil testing procedures for pastures
Featured photo: Alicia Christin Gerald / Unsplash.